Airflow has been my go-to orchestration tool for a few years. I say that like I had a choice, but really, it’s been the tool of choice for all the companies I’ve worked for, and it’s served them well. I’ve worked on self-managed setups and seen the joys of Managed Airflow in AWS. I’ve also dabbled with Prefect, but I have to say I do like Airflow and have no issue with it. It does the job, and it does it well, although I’m sure many would argue with me on that last point.
What has been an issue for me is getting a stable working (the keyword is stable here) local testing environment up and running. An Airflow setup on my laptop that was my own to test, try things and break if I wanted to. Don’t get me wrong, the internet is full of tutorials to get this going, and they do a good job of walking you through a setup, but I’ve always run into some problem or other with it.
Basically, getting a test environment up and running locally over the years has been a challenge – yes, the Docker route works, but even then it was a bit clunky to get going.
I was scrolling through LinkedIn the other day and came across a post by Daniel Beach, this post below.

“It couldn’t be that simple to get Airflow up and running,” I thought. I had 10 minutes before I had to head out, so I decided to give it a try and see how easy it was to get Airflow installed using Astro CLI. Let me save you some time here. It took less than 5 minutes to reach a log in page.
Before we dive in, let’s explore Astro CLI. What exactly is Astro CLI? According to the documentation: The Astro CLI serves as the command line interface for data orchestration. It offers the simplest way to begin working with Apache Airflow and is compatible with all Astronomer products. They make it sound so easy, but in this case, it was.
Below are the steps you need to follow to get a working Airflow instance working.
The steps to get Airflow running
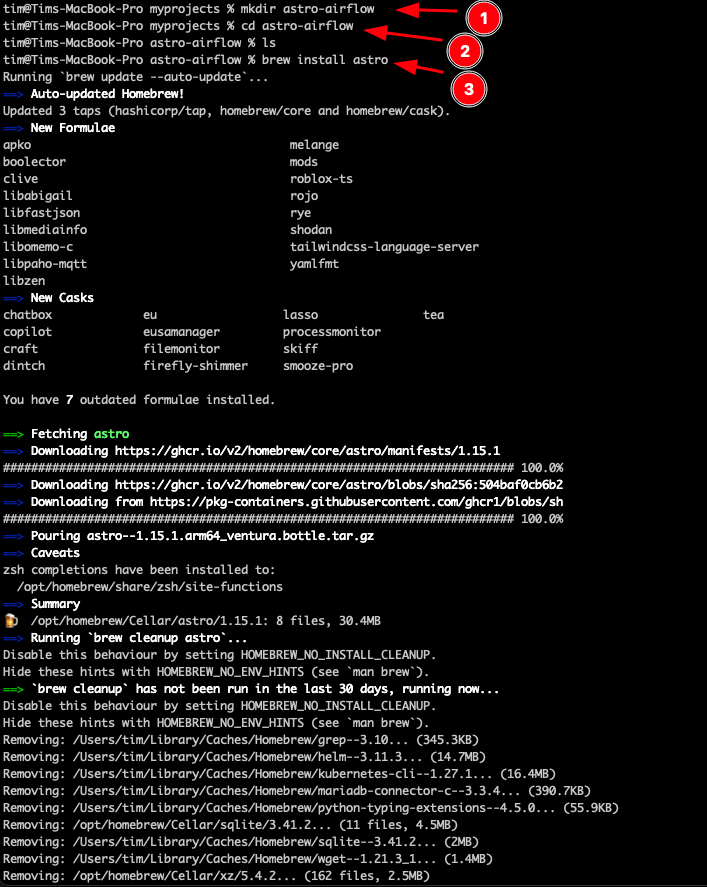
# Make a directory
mkdir astro-airflow
# Change to that directory
cd astro-airflow
# Install Astro CLI (you could do this first)
brew install astro
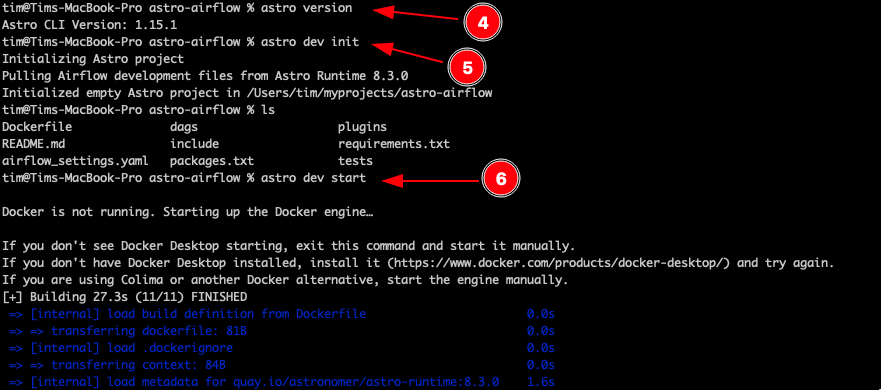
# Check if it's installed
astro version
# Initialize an Astro project in the directory
astro dev init
# Start Airflow
astro dev startThat’s it – that’s all you have to do to get a working local instance of Airflow up and running on your laptop. Honestly, it was painless, and I was a little surprised at how simple it was. Below is a screenshot of the implementation on my MacBook – the proof is there for you to see.
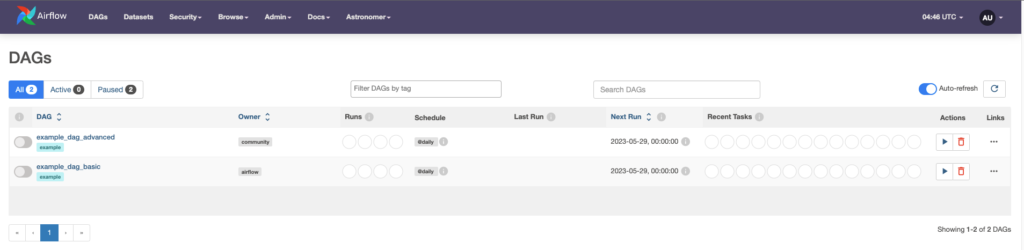
Once you execute the astro dev start command, the behind-the-scenes Docker images are initiated, and the Airflow login page is presented to you. The login credentials will be printed out in the console.

I wish I had discovered this 5 years ago; it would have saved me hours of trial and error. As I mentioned, I have only installed it and have not played around with it to any great extent yet, but I’m certain I will. It’s worth noting that to stop the Airflow instance, you simply need to execute astro dev stop , and the underlying Docker images will stop.
As always, I encourage you to visit the Astronomer Documentation for a more in-depth walk-through of the installation and setup process.
If you have come across this little corner of the internet and had the opportunity to use this implementation of Airflow, I would love to hear your thoughts on it. Happy Airflowing!
Thanks for reading! If you want to get in touch, feel free to find me on LinkedIn.